
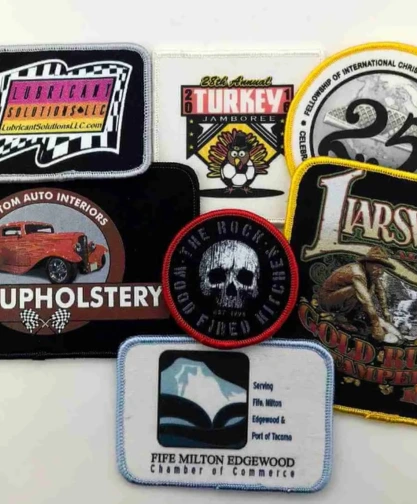
Custom embroidered patches are one of the most durable, versatile, and recognizable branding tools in existence. Schools use them on jackets. Fire departments put them on turnout gear. Construction crews wear them on caps. Military units at bases like JBLM swap them between uniforms daily.
If you’re ordering patches for the first time, or if you’ve ordered before and want better results, this guide covers everything you need to know. Patch types, how they’re made, backing options, size recommendations, design rules, and care instructions.
We’ve been making custom embroidered patches in Washington state since 1977. What’s in this guide comes from nearly 50 years of doing this, not from a product brochure.
What’s the Difference Between Embroidery and Patches?
This is one of the most common questions we get — and the answer matters for how you place your order.
Direct embroidery means stitching your design straight onto a garment. The thread goes directly into the fabric like on a polo shirt, a jacket, a hat. The design becomes part of the garment.

A patch is a separate piece of fabric, embroidered or otherwise decorated, that you then apply to a garment. The design is made independently, then attached by sewing, heat press, iron, or Velcro.
So You must choose direct embroidery when you need one consistent placement on a single garment type, like a left-chest logo on 50 polos. Otherwise you must choose a patch in any of the following situations:
- When you need the same design applied across multiple garment types, materials, or sizes. One patch run covers a jacket, a cap, a bag, and a vest.
- When the garment material isn’t embroidery-friendly like like nylon, spandex, or mesh.
- When you need a design to be removable or swappable, as military and tactical organizations at JBLM regularly do.
A patch order at NW Custom Apparel has a 100-patch minimum. If you need fewer than 100, direct embroidery on individual garments is almost always the right path.
What Types of Custom Patches Are There?
The patch you order should match your design, your budget, and where the patch is going. Here’s how the main types compare:
| Patch Type | Best For | Detail Level | Cost |
| Embroidered | Logos, bold text, uniforms | Moderate — solid colors best | Standard |
| Woven | Fine text, complex line art | High — thinner threads | Moderate |
| Printed | Photos, gradients, 10+ colors | Very high — no thread limits | Standard / fast |
| PVC / Rubber | Outdoor, tactical, 3D look | Moderate — molded shapes | Higher |
| Chenille | Varsity letters, awards | Low — texture focus | Moderate |
| Leather / Faux Leather | Workwear, premium branding | Moderate | Higher |
Embroidered Patches
Thread is stitched onto a twill or felt base to create your design. The result is slightly raised, textured, and reads as premium. Embroidered patches are colorfast and bleach-resistant, which is why they’ve been the standard for uniforms, workwear, and organizational insignia for decades.
One specification to know: embroidery percentage. This is the ratio of your patch area covered by thread versus exposed twill. A 100% embroidered patch has no visible backing fabric. A 75% embroidered patch will show some twill, which can be colored to work as a background element. Higher coverage costs slightly more — but often looks cleaner.
Woven Patches
Woven patches use finer threads than standard embroidery, woven tightly together rather than stitched onto a base. The result is flatter, with sharper edges and higher detail resolution. If your design includes small text, fine lines, or intricate detail that would blur at embroidery stitch density, woven is the better choice.

Printed Patches
Your design is printed directly onto a durable fabric base. This method handles photographic imagery, gradients, and designs with 10 or more colors — none of which embroidery handles cleanly. Printed patches are also faster to produce. We turn them around in 72 hours at our Milton facility, which makes them the right call for rush orders.
PVC / Rubber Patches
PVC patches are molded from flexible rubber-like material rather than fabric. They’re waterproof, extremely durable, and give a bold three-dimensional look. Common on outdoor gear, tactical equipment, and promotional items that need to survive harsh conditions. They don’t fray, don’t absorb moisture, and hold color well under UV exposure.
Chenille Patches
Chenille uses looped yarn rather than flat thread, creating the fuzzy, plush texture you recognize from varsity jackets and award letters. The embroidered outlines or lettering contrast against the soft chenille background. Best for school letters, achievement patches, and organizations that want a classic, collegiate look.
Merrowed Edge vs. Die-Cut: Which Border Is Right?
Every patch needs a finished edge. The two standard options are merrowed and die-cut (also called hot-cut).
Merrowed Border
A merrowed border uses an overlock stitch to wrap a raised, cord-like edge around the perimeter of the patch. It’s the traditional patch border — slightly raised, very clean, and highly durable. Merrowed edges work on standard shapes: circles, ovals, squares, rectangles, shields, and rockers. If your design uses one of these shapes, merrowed is usually the right choice.
Die-Cut / Hot-Cut Border
Die-cut patches are laser-cut or heat-cut to the exact shape of your design. This allows for complex, irregular outlines — a state shape, an animal silhouette, a logo with protrusions. The edge is sealed by the cutting process to prevent fraying. Die-cut is the choice for shapes that can’t be merrowed cleanly, and it gives a modern, precise look.
Not sure which edge to use? Simple rule: if your patch shape is a standard geometric form, go merrowed. If it has protrusions, curves, or complex silhouette shapes, go die-cut.
Patch Backing Options: Which One Fits Your Application?
The backing is what determines how the patch attaches to your garment and how well it holds over time. Get this right and your patch lasts for years. Get it wrong and it’s peeling off after a few washes.
| Backing Type | Best Application | Wash Durability | Removable? |
| Sew-On | Uniforms, dress garments | Highest — permanent | No |
| Heat Seal | Caps, jackets, workwear | High — commercial press | No |
| Iron-On | Light fabrics, casual use | Moderate — ~20–30 washes | No |
| Velcro / Hook & Loop | Military, tactical, JBLM | Very High — reusable | Yes |
| Plastic Backing | Collectible caps, display | Shape-retaining | No |
| Adhesive / Peel-and-Stick | Temporary / display only | Low — not for washing | Yes |
Sew-On Backing
No adhesive, no stiffener — the patch is sewn directly onto the garment. Sew-on is the most permanent and most durable option. A professionally sewn patch will outlast the garment itself. Use sew-on for dress uniforms, fire department insignia, award patches, and any application where the patch is never moving.
Heat Seal Backing: The Workwear Standard
An industrial heat press bonds the patch permanently to fabric. This is the standard method for patch caps, workwear jackets, and branded uniforms at Northwest Custom Apparel. It’s fast, clean, and holds through heavy commercial use. Note that heat seal is not compatible with nylon or most synthetic fabrics, where sew-on backing is the better option.

Iron-On Backing
A heat-activated adhesive applied with a standard household iron. Convenient for casual use and lighter garments. The bond is real but not permanent — expect 20 to 30 wash cycles before edges begin lifting. For garments that see hard use or frequent washing, reinforce iron-on patches with a few stitches around the perimeter.
Velcro (Hook and Loop) Backing

The hook side is applied to the patch. The loop side is sewn to the garment. The patch attaches and removes cleanly, with no damage to either surface. This is the standard for military uniforms — unit insignias, morale patches, and rank patches on Army Combat Uniforms (ACUs) are swapped frequently as assignments change. Velcro backing is also popular for tactical gear, shooting sports, and any program where patch designs rotate regularly.
For Washington state organizations and units at Joint Base Lewis-McChord, we supply hook and loop backed patches regularly. It’s one of our most active product categories.
If you’re in the South Sound and need patches fast, our Milton facility serves Tacoma, Fife, Federal Way, Puyallup, and surrounding areas — with nationwide shipping for larger programs. For local clients specifically, see our Tacoma patch-making history and local services guide for more context on what we produce for Pierce County organizations.
How Are Custom Embroidered Patches Made? The 6-Step Process
Understanding the production process helps you submit better artwork, set realistic timelines, and avoid expensive revisions.
- Artwork submission. You send us your logo, graphic, or design concept. Vector files (AI, EPS, SVG, PDF) produce the sharpest results. High-resolution raster files (PNG or JPG at 300 DPI minimum) also work. If your artwork needs cleanup, we handle that as part of setup.
- Digitizing. A trained digitizer converts your artwork into a stitch file — a set of machine-readable instructions that tell the embroidery machine exactly where to place each stitch, in what direction, at what density. This is the most skilled step in the process. Poor digitizing produces patches with gaps, puckering, and color bleed. Good digitizing produces clean, crisp results that hold up through years of washing. Professional shops use software like Wilcom EmbroideryStudio or Tajima Pulse for this step. The one-time setup fee on your order covers digitizing.
- Digital proof. We send you a digital proof showing exactly how your patch will look — colors, layout, stitch coverage, border style. You approve it before we run a single stitch. This is where you catch problems, not after the run.
- Production. Your approved design runs on multi-head commercial embroidery machines. Patches are produced on a twill or felt base fabric, hooped and stitched in sequence. Each patch in your order is identical to the approved proof.
- Finishing. Patches are cut to shape — merrowed border or die-cut depending on your specification. Backing is applied: heat seal, sew-on, Velcro, iron-on, or plastic, depending on your order. Edges are inspected and any loose threads are trimmed.
- Quality check and shipping. Each batch is reviewed before packaging. Your patches ship from our Milton, WA facility, or you can arrange local pickup.
We have a team of experts dedicated to helping you create the perfect emblem. You can learn more about our manufacturing process in our blog post, Behind the Stitch: The Custom Patch Manufacturing Process.
What Software Is Used to Design Embroidered Patches?
There are two different things people mean when they ask this question. One is design software — used to create the artwork before it goes to a patch maker. The other is digitizing software — used by the embroidery shop to convert that artwork into machine-readable stitch files.
For Designing Your Artwork
Adobe Illustrator is the standard for professional patch artwork. It produces vector files (.AI or .EPS), which scale to any size without pixelation and give digitizers the cleanest possible source file to work from. Affinity Designer is a strong, lower-cost alternative. If you don’t have access to vector software, a high-resolution PNG (300 DPI or higher) is acceptable — but expect the digitizer to do more cleanup work, which can affect turnaround time.
For Digitizing (What the Patch Maker Uses)
The patch shop’s digitizer works in specialized embroidery software — not general design software. Industry standards include Wilcom EmbroideryStudio (used by most commercial decorators in the U.S.), Tajima Pulse, and Hatch Embroidery by Wilcom for smaller shops. These programs convert your vector artwork into stitch files in formats like DST, PES, or EMB that commercial embroidery machines read directly.
You don’t need to own or operate this software. When you order from NW Custom Apparel, our team handles digitizing as part of the production process. The one-time setup fee on your order covers this step.
Can you design your own embroidery design? Yes — if you can produce a clean vector file or high-resolution PNG, you can submit your own artwork. We’ll digitize it. If you need design help from scratch, our team can work from a brief, a sketch, or a reference image. Design assistance is available on request.

Precise Embroidery for a Lasting Impression
Elevate your brand with quality embroidery that stands the test of time. Perfect for construction uniforms, corporate wear, and team apparel.
Explore Custom Embroidery OptionsPatch Design Rules: What Works and What Doesn’t
Embroidery has constraints that flat printing doesn’t. Designing around them before you submit artwork saves time and money.
Size Your Text Correctly
Text on an embroidered patch needs to be at least 0.25 inches (6mm) tall to remain legible. Below that threshold, thread density blurs letter edges and characters run together. If your design includes small text, consider switching to a printed patch, which handles fine detail at any size.
Limit Colors, Especially at Small Sizes
Standard patch orders include up to 10 thread colors. Additional colors add cost. More importantly, highly complex color gradients and shading effects that work in print don’t translate cleanly to thread — embroidery produces solid color fields, not continuous tones. Design for bold, distinct color areas with strong contrast between elements.
Simplify Complex Logos

A logo that looks sharp on a business card can fall apart at 3 inches in thread form. Thin lines may not stitch cleanly. Fine gradients get lost. Small elements crowd each other. Before ordering, look at your logo at the actual patch size you’re planning. If individual elements are hard to read at that scale, simplify — remove small details, thicken lines, reduce the element count.
Choose the Right Shape for Your Design
Standard shapes such as circle, oval, shield, square, rectangle, and rocker are the most cost-effective and work with merrowed borders. Custom die-cut shapes cost slightly more but allow exact silhouettes. Match the shape to the design: a round patch for a round logo, a shield for a department insignia, a die-cut for a state outline or animal shape.
Match Coverage Percentage to Your Design
If your design has a solid background color, a 100% embroidered patch gives the cleanest result — every square inch is thread. If your design uses the twill as a background element (common in simpler logos), a 75–80% coverage level is less expensive and can look just as good. Discuss this with us when you submit artwork.
What Size Should Your Patch Be?
Patch size determines legibility, placement, and visual impact. Here’s a practical guide by application:
| Patch Size | Recommended Placement | Notes |
| 1–2 inches | Hats, lanyards, lapels | Keep design simple — limit to 1–2 elements |
| 2–3 inches | Shirt chest, bag straps, sleeves | Good for logos with name + icon |
| 3–4 inches | Jacket chest, backpack front | Standard uniform / workwear size |
| 4–6 inches | Jacket back center, vest front | Bold branding, school letters |
| 6+ inches | Back of jacket, large outerwear | Full logo treatments, commemorative patches |
A note on calculating size: patch size is typically expressed as the average of the height and width. A patch that’s 3 inches tall and 4 inches wide is a ‘3.5-inch patch.’ This matters for pricing, which is based on size.
How to Care for Embroidered Patches
A well-made patch is extremely durable. High-quality embroidered patches withstand 50 or more domestic wash cycles without significant color loss or edge deterioration — but only if you care for them correctly.
Washing
- Turn the garment inside out before washing. This protects the thread surface from abrasion against other items in the load.
- Use the gentle or delicate cycle. High-agitation cycles stress patch edges and backing adhesive.
- Wash in cold or warm water. Avoid hot water, which degrades iron-on adhesives faster.
- Use a mild detergent. Avoid bleach near patch edges — bleach attacks thread dyes and weakens backing materials.
Drying
- Air dry when possible. High heat in a dryer accelerates adhesive breakdown on iron-on and heat-seal backed patches.
- If machine drying, use low heat.
- Do not iron directly over an embroidered patch. Use a pressing cloth as a barrier, or flip the garment inside out to iron from the back.
Re-securing a Lifting Patch
If an iron-on patch starts lifting at the edges, reinforce it with a few hand stitches around the perimeter. A basic running stitch or zigzag stitch at the patch edge resets the bond. This is the most common maintenance issue with iron-on patches after 20 to 30 washes.
Storage
Store patches flat or loosely rolled ,not folded. Folding creates a crease in the twill backing that can become permanent. Keep patches away from direct sunlight and high humidity during storage. Both accelerate color fading and adhesive degradation.
Ordering Your Patches from NW Custom Apparel
When you’re ready to move from design and planning to ordering, choosing a reliable provider is key. Here’s what to expect and how NW Custom Apparel stands out.
- Experience & Track Record: Look for suppliers with glowing reviews, transparent pricing, and customization options. Examples include Printful, and Etsy. However, NW Custom Apparel outclass these suppliers with over 46 years of experience in custom embroidery services in Washington state. We are known for delivering the best custom patches to various industries with positive track record.
- Proofs & Samples: Look for providers who offer digital proofs and, if possible, stitch-out samples before full production. That helps catch design or color issues early.
- Clear Pricing & Minimums: Be aware of setup/digitizing fees, color count costs, backing types, edge finishing, and minimum order quantities. Large quantities often bring better per-patch pricing.
- Lead Time & Turnaround: Know their typical time for design approval, production, and shipping. If you have tight deadlines, communicate them early.
When you’re ready to bring your design to life, we’re here to help. We have a team of experts dedicated to helping you create the perfect emblem. You can learn more about our manufacturing process in our blog post, Behind the Stitch: The Custom Patch Manufacturing Process.
The Short Version
Custom embroidered patches are made by digitizing your artwork into stitch instructions, running those stitches onto a twill or felt base, cutting to shape, and applying your chosen backing. The patch type, edge treatment, backing, and size you choose depend on what the patch is going onto, how permanent it needs to be, and how complex your design is.
If you’re in Washington state and need patches made by people who have been doing this since 1977, call us at 253-922-5793 or use the quote request form on our custom patch services page. We’ll point you in the right direction in one conversation.
Northwest Custom Apparel. Milton, WA. Serving Washington state since 1977.
Frequently Asked Questions (FAQs)
Custom embroidered patches are made using embroidery machines that stitch your chosen design onto a fabric backing. The process begins with digitizing your design, converting it into a format readable by the machine. The machine then layers threads over the base fabric to create the design, and additional steps like attaching backing types or cutting the edges complete the process.
A patch’s size is calculated by adding its largest height and width together and dividing that number by two.
Depends on where and how the patch is used. Sew-on is most durable, iron-on is convenient, Velcro allows removal or switching, adhesives are temporary/light use.
Yes, many suppliers offer no minimum order options, especially for small-scale or personal projects. However, keep in mind that larger orders often benefit from bulk discounts, which can significantly reduce the per-patch cost. Always check with the supplier to confirm their minimum requirements.
With proper care, embroidered patches can last for several years. The longevity is thanks to high-quality threads and sturdy fabric backings. To maintain their vibrant appearance, wash garments carefully and avoid excessive heat.
While the threads themselves are generally water-resistant, the backing type determines waterproofing. Sew-on patches or those with PVC backings are better suited for wet environments, whereas iron-on and adhesive backings may lose effectiveness if exposed to a lot of moisture.
Absolutely! Most patch suppliers allow you to fully customize your design. You can choose the colors, size, shape, and additional features like metallic threads or glow-in-the-dark accents. Providing a clear, high-resolution image or logo helps ensure that your patch turns out exactly as envisioned.
Yes, we can! Just provide us with a high-resolution photograph or the physical patch, and we can digitize it to create a duplicate.
Yes. We have a wide selection of thread colors available to match your design and branding requirements.
Yes, we do! We offer both “Made in the USA” patches and patches made overseas to meet different needs and price points.
Size, number of colors, type of backing, type of edge finish, quantity, and complexity (e.g. very fine details or special threads) all affect final cost. Larger patches with intricate patch designs typically cost more. Check this pricing table to find the exact cost of embroidery patch against number of pieces.


