
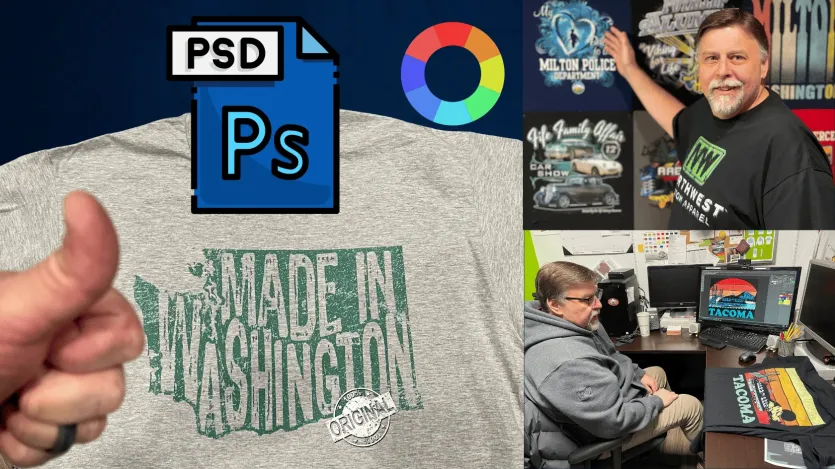
Creating custom t-shirts is a fantastic way to showcase your creativity, promote a brand, or celebrate a special event. With Adobe Photoshop, you can design unique, professional-quality t-shirts that stand out from the crowd. Whether you’re a seasoned graphic designer or a beginner, this guide will walk you through the process of how to design a t-shirt in Photoshop, from start to finish.
Why Use Adobe Photoshop for T-Shirt Design?
Adobe Photoshop stands out as one of the best software for designing t-shirts, thanks to its powerful features and versatility. Whether you’re creating custom designs for personal use, promoting a brand, or launching a clothing line, Photoshop provides the tools you need to achieve professional results.
Adobe Photoshop is one of the most powerful tools available for creating stunning t-shirt designs. It’s widely used in the graphic design for apparel industry because of its versatility, precision, and vast array of features. From manipulating images to adjusting colors and adding text, Photoshop provides everything you need to bring your ideas to life.
Here’s why designers prefer Photoshop:
- Layer Control: Easily manage multiple design elements like layers, shapes, and text.
- Custom Brushes and Filters: Add textures, patterns, and effects to enhance your design.
- Precision Editing: Adjust colors, contrast, and sharpness for a professional finish.
- Template Support: Use pre-made t-shirt design templates in Photoshop to speed up your workflow.
- High-Quality Output: Ensures print-ready designs with accurate colors and scalable formats.
Whether you’re working on a t-shirt design for a company event, a fashion line, or personal use, Photoshop gives you the flexibility to create something unique.

You can easily create custom t-shirts by using Adobe Photoshop.
Getting Started with T-Shirt Design in Photoshop
1. Setting Up Your Canvas
Before diving into your design, set up your canvas to match the dimensions for t-shirt printing. Use the following settings:
- Resolution: 300 PPI (pixels per inch) for crisp, clear prints.
- Color Mode: CMYK for accurate color reproduction during printing.
- Canvas Size: Typically, 12×16 inches works well for most t-shirts.
Open Photoshop, click on “File,” then “New,” and enter these settings to start your project.
2. Choosing a T-Shirt Design Template
Using a t-shirt template for Photoshop can save you time and help you visualize how your design will look on fabric. Websites like Freepik, Creative Market, and GraphicRiver offer a wide range of free and premium t-shirt templates to get you started. Many free and premium options are available online. Once downloaded, open the template in Photoshop and use it as a base for your artwork.
3. Sketching Your Idea
Good designs often start with a simple sketch. Use Photoshop’s brush tool to create rough outlines of your concept. If you already have a drawing, scan and import it into Photoshop as a new layer.

Your Brand, Bold and Brilliant
Create custom t-shirts with striking designs to make your brand unforgettable. Ideal for promotional events, employee gifts, and team spirit.
Create Your Custom Printed ShirtsHow to Design a T-Shirt in Photoshop
Adding Text and Fonts
Typography plays a significant role in t-shirt design. Follow these steps to make your text pop:
- Select the Type Tool: Press “T” on your keyboard to activate the text tool.
- Choose a Font: Pick a font that suits your design’s theme. For example, bold sans-serif fonts work well for modern designs, while script fonts add a touch of elegance.
- Adjust Spacing: Use the character panel to tweak letter spacing (kerning) and line height (leading).
Experiment with different fonts, sizes, and alignments to find what works best for your design.
Adding Graphics and Images
Images can elevate your Photoshop t-shirt design. Here’s how to incorporate them effectively:
- Import Your Image: Drag and drop an image file into your Photoshop project.
- Remove Backgrounds: Use the magic wand or lasso tool to isolate your subject.
- Resize and Position: Adjust the image size and placement using the transform tool (Ctrl+T or Cmd+T).
High-quality images with transparent backgrounds work best for t-shirt designs.
Utilizing Shapes and Layers
Shapes and layers are the backbone of any good design. Here’s how to use them effectively:
- Add Shapes: Use the shape tool to create circles, rectangles, or custom paths.
- Organize Layers: Name and group your layers for easy management.
- Layer Styles: Apply drop shadows, gradients, or strokes to make your design elements stand out.
Refining Your T-Shirt Design
Color Adjustments
Accurate colors are crucial for t-shirt printing. Photoshop offers several tools to perfect your color palette: For example, classic combinations like black text on a white shirt or bold complementary colors like blue and orange often work well. Subtle pastel palettes can add elegance, while neon shades can make your design stand out. Experiment with these combinations to find the perfect balance for your t-shirt.
- Hue/Saturation Adjustment: Modify individual colors to achieve the desired tone.
- Levels and Curves: Adjust brightness, contrast, and tonal balance.
- Color Picker: Choose colors that complement each other and fit your design’s theme.
Applying Filters and Textures
Filters and textures add depth and character to your design. For example:
- Filters: Use the blur, sharpen, or posterize filters for unique effects.
- Textures: Overlay textures like fabric, grunge, or paper to simulate real-world materials.
Experiment with blending modes to achieve different looks.
Using Masks and Clipping Paths
Masks and clipping paths give you precise control over your design elements. Here’s how to use them:
- Clipping Masks: Attach an image to a shape or text layer for creative effects.
- Layer Masks: Hide or reveal parts of a layer using black-and-white brushes.

Detailed, Durable, Direct-to-Garment Printing
Perfect for intricate designs, small-batch orders, and eye-catching colors. Make your brand vision a reality with DTG printing.
Get Custom DTG Printing SolutionOutputting Your Design for Screen Printing and Digital Printing
File Formats
Save your design in the correct format for both screen and digital printing:
- PNG: For designs with transparent backgrounds.
- PDF or EPS: For vector graphics and high-quality prints.
Resolution Check
For screen printing, use vector graphics (PDF or EPS) to ensure scalable and sharp designs. For digital printing, PNG files with transparent backgrounds work best to preserve detail and clarity. Ensure your design maintains a resolution of 300 PPI to avoid pixelation during printing.
Export Settings
Go to “File > Export > Save for Web” to optimize your file for digital printing. Digital printing uses direct-to-garment (DTG) technology, ideal for small batches or designs with intricate gradients and multiple colors. Ensure you consult your printer regarding fabric compatibility and ink requirements for the best results. Use RGB color mode for digital displays or CMYK for professional printing to ensure color accuracy. RGB is ideal for screen designs, offering vibrant hues, while CMYK provides better control for print outputs, as it closely matches printer ink colors. Choose the appropriate color profile (CMYK or RGB) based on your printer’s requirements.

Tips for Professional T-Shirt Designs
- Use High-Quality Images: Avoid low-resolution graphics to maintain print quality.
- Keep It Simple: Clean, uncluttered designs are more visually appealing.
- Test Print: Print a sample to ensure colors and details look as expected. Check alignment to verify the design is centered properly, review color accuracy to match your intended palette, and confirm the resolution to avoid blurry or pixelated areas. Paying attention to these details ensures a polished final product.
- Involve Your Audience: Gather feedback on your design to refine it further.

FAQs: T-Shirt Design in Photoshop
1. What resolution is best for t-shirt printing?
A resolution of 300 PPI is ideal for t-shirt designs. It ensures crisp, detailed prints that look professional.
2. Can beginners use Photoshop for t-shirt design?
Absolutely! Photoshop’s intuitive tools and tutorials make it accessible for users of all skill levels. Beginners can start with resources like Adobe’s official Photoshop tutorials, YouTube channels like “Photoshop Training Channel,” or online courses from platforms like Udemy or Skillshare to build foundational skills. Start with simple designs and build your skills over time.
3. Are there free templates for t-shirt design in Photoshop?
Yes, many websites offer free and premium t-shirt design templates for Photoshop. These templates help you visualize your design on a t-shirt mockup.
4. How do I ensure my colors print accurately?
Use CMYK color mode and consult your printer for specific color profiles. Always request a proof before final printing.
5. Can I create custom graphics in Photoshop?
Yes! Use brushes, shapes, and text tools to craft original designs. Combine layers and effects for a personalized touch.
Conclusion
Adobe Photoshop is an essential tool for anyone looking to create professional, custom t-shirts. With its vast array of features—from layers and masks to color adjustments and filters—Photoshop empowers you to bring your vision to life. Whether you’re designing for personal projects or commercial purposes, following this guide will help you master Photoshop t-shirt design and produce stunning results. So, fire up Photoshop and let your creativity shine!ng results. So, fire up Photoshop and let your creativity shine!
Author
Steve Deland is Northwest Custom Apparel’s graphic artist with nearly four decades of experience developing t-shirt designs. Feel free to follow Steve on Social Media to stay atop his graphic design tips for t-shirts. You can check out some of Steve’s other posts at the Apparel Graphic Academy.


