

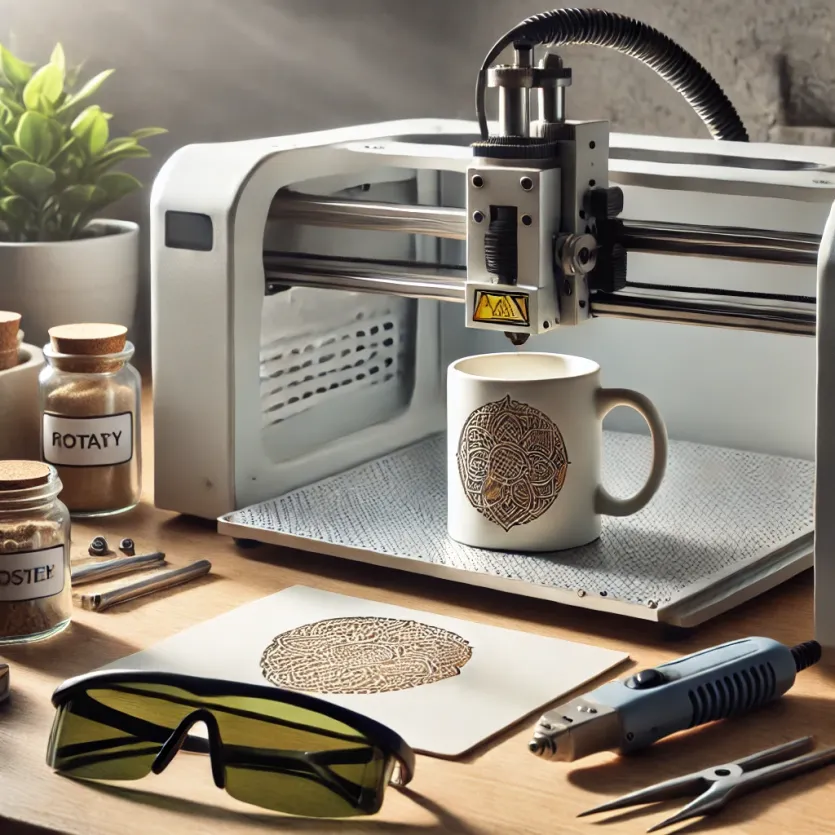
Have you ever admired those detailed designed mugs with names, quotes, or logos etched right into the surface? That’s the magic of laser engraving, a modern way to personalize everyday items. Laser-engraved mugs are wildly popular for personal gifts, promotional products, and even small business ventures. They combine practicality with a touch of individuality—perfect for anyone looking to create something memorable.
In this guide, we’ll walk you through everything you need to know about laser engraving mugs. From understanding the basics of the technology to picking the best materials and tools, you’ll get all the tips and tricks to make your engraving journey smooth and successful. Whether you’re a hobbyist, a small business owner, or just curious, this guide will help you master the art of mug engraving.
What is Laser Engraving?
Laser engraving is a process that uses a focused beam of light to carve or etch designs onto a surface. Unlike printing, which applies ink to the surface, engraving removes material to create permanent, precise designs. It’s versatile, durable, and works on a variety of materials, including mugs.
Here’s how it works: A laser engraver directs an intense, highly focused beam of light onto the mug’s surface. This heat is so concentrated that it vaporizes the material in the targeted area, creating a clean, sharp design. The result? A long-lasting, scratch-resistant finish.
Select the Right Mug for Engraving
Choosing the right mug is crucial to getting great results. Not all mugs are created equal; materials and surface finishes can greatly impact the engraving process.
Materials
- Ceramic Mugs
Ceramic is a classic choice for laser engraving. These mugs are durable and come in various finishes, like matte or glossy. CO2 lasers work best for engraving ceramic surfaces, but you may need to apply a laser marking spray for better contrast on uncoated ceramics. - Glass Mugs
Glass mugs are ideal for creating an elegant frosted effect. However, they require careful handling and precise laser settings to avoid cracking. You can also use masking tape or a wet paper towel to dissipate heat during engraving. - Stainless Steel Mugs
Stainless steel mugs are perfect for outdoor enthusiasts and coffee lovers alike. Fiber lasers excel at engraving metal surfaces, creating crisp, detailed designs. Some coated steel mugs can also be engraved using CO2 lasers. - Plastic Mugs
While not as common, some plastic mugs can be laser engraved. Be sure to check the material’s composition; certain plastics may emit harmful fumes when exposed to laser engraving. Always work in a well-ventilated area and follow safety precautions.
Surface Considerations
- Glazed vs. Unglazed
Glazed ceramic mugs often produce more vibrant and defined engravings due to their smooth, reflective surfaces. Unglazed mugs, on the other hand, create a rustic, natural finish but may require additional prep work. - Color and Coatings
The mug’s color or coating can affect the engraving’s visibility. For example, a black-coated stainless steel mug reveals a striking silver design when engraved. Similarly, applying a laser marking spray to clear glass or ceramic enhances contrast for a professional finish.
Choose the Right Laser Engraving Machine for Mugs
Laser engraving mugs requires the right type of machine, tailored to your material, design needs, and budget. Let’s break down the main types of laser engravers and the essential features to look for when selecting one.
Types of Laser Engravers and Their Suitability
Diode Laser Engravers
These are compact, affordable, and beginner-friendly, making them ideal for hobbyists. They excel at engraving soft materials like wood, leather, and coated plastics. Their lower power makes them less effective on hard surfaces like glass and metal unless pre-treated. If you’re mainly engraving coated ceramic mugs or plastic tumblers, a diode laser could be a practical choice.
CO2 Lasers
They’re powerful, versatile, and widely used in professional setups. They can handle a range of materials, including ceramic, glass, and even coated stainless steel. If you plan to work with a wide variety of mugs or scale up your production, a CO2 laser engraver is an excellent investment. Just make sure to pair it with a rotary attachment for engraving cylindrical surfaces like mugs evenly.
Fiber Lasers
Specifically designed for metal surfaces, fiber lasers are ideal for engraving stainless steel and titanium mugs. These machines are powerful and deliver highly precise engravings at remarkable speed. They offer speed and precision but are unsuitable for non-metallic materials like ceramics or glass. Keep in mind that fiber lasers aren’t suitable for non-metallic materials like ceramic or glass. However, these are typically more expensive, catering to professional or industrial needs.
Related Posts You might enjoy
Key Features to Consider
Power and Speed
The laser’s power output determines what materials you can engrave and how quickly you can work. For example, a CO2 laser with 40–60 watts is sufficient for most mug engraving projects. And Fiber lasers with higher power (100+ watts) offer faster results but may require a higher investment. Faster machines save time, especially for bulk orders.
Engraving Area Size
The engraving bed size dictates how large your designs can be. For mugs, a smaller engraving area is sufficient, but if you’re working with bulk orders or larger items, opt for a machine with a bigger workspace.
Rotary Attachments for Cylindrical Objects
Engraving mugs evenly requires a rotary attachment, which rotates the mug during engraving. This tool ensures consistent designs around the curved surface and prevents distortion. Check if your laser engraver is compatible with rotary attachments or includes one as a feature.
Making the Right Choice
- For Beginners: Diode lasers are cost-effective and user-friendly, perfect for simple projects.
- For Versatile Use: CO2 lasers handle a wide range of materials and are great for scaling up production.
- For Metal Engraving: Fiber lasers offer unparalleled precision and speed for engraving stainless steel and other metals.
Preparing Your Design
A good design is the backbone of a successful engraving project. Whether you’re engraving a name, logo, or intricate pattern, planning and preparation make all the difference.
Design Software Options
To create your engraving designs, you’ll need design software that’s compatible with your laser engraver. Here are some options:
Free Software Recommendations
- Inkscape: An open-source vector graphic editor, ideal for beginners.
- LaserGRBL: A free tool for controlling your engraver and importing designs.
Paid Software Recommendations
- Adobe Illustrator: Perfect for creating detailed vector designs, though it has a steeper learning curve.
- CorelDRAW: A user-friendly alternative with powerful features for engraving projects.
- LightBurn: Tailored for laser engravers, offering seamless integration with most machines.
Design Considerations
Resolution and Detailing
High-resolution designs ensure sharp and detailed engravings. For laser engraving, aim for a resolution of 300–600 DPI (dots per inch). Avoid overcrowding your design with tiny details that may not translate well onto the mug’s surface.
Sizing and Placement on the Mug
Keep your design proportional to the mug’s size. A standard engraving area on a mug is about 3 inches by 3 inches, but this varies with mug dimensions. Use your software’s preview function to position the design accurately. Consider the curvature of the mug to avoid distortions, especially for text or logos.
How to Laser Engraving a Mug
Creating a beautifully engraved mug takes a mix of preparation, precision, and attention to detail. Follow these step-by-step instructions to ensure a flawless result.
Step 1: Preparing the Mug
Cleaning and Surface Preparation

Start with a clean surface to achieve the best engraving results. Use soap and water to remove dirt, grease, or fingerprints. For stubborn stains, try rubbing alcohol or a mild cleaner. Dry the mug completely to prevent moisture from interfering with the laser beam.
Applying Laser Marking Paper or Coating (if necessary)
For materials like uncoated ceramic or clear glass, apply a laser marking spray or paper. These products enhance contrast, making the engraving more visible and professional. Let the coating dry completely before proceeding to the next step.
Step 2: Setting Up the Engraving Machine
Installing and Calibrating the Rotary Attachment
If your machine requires a rotary attachment, install it securely. This tool rotates the mug during engraving, ensuring the design wraps evenly around its curved surface. Adjust the rollers or clamps to hold the mug firmly without damaging it. Test the rotation manually to ensure smooth movement.
Adjusting Laser Settings (Power, Speed, Focus)
Set the laser’s power and speed based on the material of your mug. For instance:
- Ceramic: Moderate power with slower speed.
- Glass: Lower power to avoid cracks.
- Stainless steel: High power for deep, crisp engravings.
Use the focus tool or your machine’s built-in features to ensure the laser is perfectly aligned with the mug’s surface.
Step 3: Positioning the Design
Aligning the Design on the Mug
Upload your design into the engraving software and preview it. Use the software’s positioning tools to place the design within the mug’s engraving area. Adjust for symmetry, ensuring the design is centered and level.
Running a Test Frame
Before engraving, run a test frame. This step traces the design’s outline on the mug without firing the laser. It helps confirm the positioning and alignment, preventing errors.
Step 4: Executing the Engraving Process
Monitoring the Engraving
Start the engraving process and monitor the machine closely. Watch for issues like uneven engraving or missed areas. Some materials, like glass, may require you to pause and apply cooling techniques (e.g., using a damp paper towel) to prevent cracks.
Addressing Common Issues
- Misalignment: Pause the process and recalibrate the rotary attachment or reposition the mug.
- Inconsistent Engraving: Check the focus and clean the laser lens to ensure consistent beam strength.
Step 5: Post-Engraving Finishing
Removing Residual Coating or Debris
For mugs with a laser marking spray or coating, rinse the surface under warm water and gently scrub with a soft cloth. For uncoated materials, use a microfiber cloth to remove dust or residue left from the engraving.
Cleaning and Inspecting the Final Product
Examine your mug for any imperfections. Look for sharp edges, smudges, or incomplete sections. A quick polish with a non-abrasive cleaner will leave your mug looking professional and ready to impress.
Safety Considerations
Laser engraving is a powerful process, but it comes with safety risks. Follow these guidelines to protect yourself and those around you.
Protective Gear
Eye Protection
Always wear laser safety goggles designed for the wavelength of your laser engraver. The laser beam can cause permanent eye damage, even from reflected light. Make it a habit to put on your goggles before turning on the machine.
Ventilation and Workspace Safety
Engraving certain materials, like plastic, can release harmful fumes. Work in a well-ventilated area or use an exhaust system to remove smoke and particles. Avoid engraving unknown materials that may emit toxic substances.
By taking these safety precautions and following the step-by-step guide, you can create stunning engraved mugs with confidence and precision. Up next, we’ll dive into troubleshooting tips and creative ideas to elevate your mug designs.
Troubleshooting and Common Mistakes
Even with the best preparation, issues can arise during laser engraving. Here’s how to fix common problems:
- Engraving is Too Light or Faint
Check your power settings and increase the laser’s intensity. Ensure the material is compatible with your machine and consider using a laser marking spray for better contrast. - Uneven Engraving
Ensure the mug is firmly secured in the rotary attachment. Recalibrate the machine and verify that the laser beam is properly focused on the surface. - Cracked or Damaged Mugs
This is often an issue with glass mugs. Use a lower power setting, and apply a damp paper towel or masking tape to dissipate heat during engraving. - Design Misalignment
If the design appears off-center or crooked, double-check your positioning in the software and confirm that the rotary attachment rotates smoothly. Running a test frame helps avoid this.
Creative Tips for Unique Mug Engravings
Want your designs to stand out? Try these creative ideas:
- Combine Engraving with Color-Fill
After engraving, fill the design with acrylic paint or food-safe markers for a pop of color. - Custom Shapes and Patterns
Create unique textures by experimenting with line thickness and engraving depth. Patterns like floral designs or geometric shapes are particularly striking. - Engraving Handles or Bottoms
For a quirky touch, engrave small designs or text on the mug’s handle or bottom. Think: a personal message or a logo. - Personalization at Scale
If engraving mugs for a wedding, event, or business, batch process your designs using software automation to save time.
Cost Considerations
Laser engraving can be an affordable hobby or a lucrative business, depending on your approach. Here’s a quick breakdown:
- Startup Costs:
Entry-level diode lasers start around $200, while professional CO2 or fiber lasers can range from $1,000 to $10,000. - Material Costs:
Ceramic mugs typically cost $1–$5 each, while stainless steel or custom-coated mugs are slightly higher. - Maintenance:
Regular cleaning of your laser lens and rotary attachment is essential. Replacement parts, like laser tubes, can cost $50–$300, depending on the machine.
Eco-Friendly and Sustainable Practices
Laser engraving is already a low-waste process, but you can make it even more eco-friendly:
- Choose Sustainable Materials: Opt for mugs made from recycled or sustainably sourced materials.
- Reuse Mistakes: If a design doesn’t turn out as planned, consider sanding or repainting the mug to try again.
- Minimize Energy Use: Use energy-efficient laser engravers and turn off your machine when not in use.
Final Thoughts
Laser engraving mugs is a rewarding craft, whether you’re making personalized gifts, promoting your brand, or starting a small business. By understanding the materials, choosing the right laser engraving machine, and following safe, precise techniques, you can create stunning, professional-quality mugs that leave a lasting impression.
Keep experimenting, learning, and perfecting your skills. With each project, you’ll unlock new possibilities for creativity and craftsmanship. Ready to engrave your masterpiece? Grab your mug and let the laser do the magic!
FAQ Section: Can You Laser Engrave a Mug?
Yes, you can laser engrave colored mugs, but the visibility of the design depends on the mug’s material and finish. For colored ceramic mugs, a CO2 laser works best to remove the top layer of color, revealing the underlying material. If the mug is coated in a dark color, the contrast will typically make the design more prominent. Using a laser marking spray on light-colored or non-contrasting materials can improve visibility and make the engraving pop.
Yes, laser engraving works on mugs with a glossy finish, but it may require additional steps. The smooth surface can sometimes cause light reflection, affecting engraving precision. To address this, apply a laser marking spray or tape to the surface before engraving. This preparation reduces reflection and ensures a clean, detailed design.
Most laser-engraved mugs are dishwasher-safe, as the engraving process creates a permanent mark that won’t fade or wash away. However, this depends on the mug’s material and coating. For example, stainless steel mugs and uncoated ceramics typically handle dishwashing well. If the mug has a special coating or paint, it’s best to check with the manufacturer or hand wash to preserve its quality.
The time it takes to engrave a mug depends on the complexity of the design, the power of the laser engraver, and the material of the mug. On average:
Simple text or logos: 2–5 minutes
Intricate patterns or photos: 10–20 minutes
Higher-powered lasers, like fiber or CO2 machines, often comp
Yes, you can engrave photos or intricate designs on mugs, but it requires high-resolution images and precise laser settings. Use design software like LightBurn or CorelDRAW to convert the image into a vector or raster format suitable for engraving. Set the laser’s resolution to at least 300 DPI for clear, sharp results. Remember, designs with too much detail may lose clarity on small engraving areas.


